🚀 Getting Started with Velox AI Input
Your complete guide from downloading the app to completing your first voice input. Follow these steps to be up and running in under 10 minutes.
📋 Table of Contents
- Download & Install Velox
- First Launch & Permissions
- Configure Your API Provider
- Your First Voice Input
- Tips & Best Practices
- Keyboard Shortcuts
- Speaking Tips
- Writing Styles
- Language Settings (New!)
- Appearance Mode (New!)
- Dashboard & Statistics (New!)
- History Management
- Trial & Purchase
- Troubleshooting
📦 What You'll Need
- Mac Computer: macOS 13.0 or later
- Internet Connection: For downloading and API setup
- Microphone: Built-in or external microphone
- API Key: From Groq, Alibaba Cloud Bailian, or another provider you configure
- Time Required: 10-15 minutes for complete setup
Step 1: Download & Install Velox
Download from Mac App Store (Recommended)
The easiest way to get Velox is through the Mac App Store. This ensures you get automatic updates and the most secure version of the app.
- Open the Mac App Store on your Mac
- Search for "Velox AI Input"
- Click "Get" or the download button
- Enter your Apple ID password or use Touch ID if prompted
- Wait for the download and installation to complete

Alternative: Direct Download (DMG) (Advanced Users)
If you prefer to download the app directly, you can get the DMG file from our website.
- Visit d.ai-voice-input.com/packages/Velox.dmg
- Download the Velox.dmg file
- Open the downloaded DMG file
- Drag Velox.app to your Applications folder
- Eject the DMG and delete it

Step 2: First Launch & System Permissions
Launch Velox for the First Time
After installation, you'll need to launch Velox and grant it the necessary permissions to work properly.
- Open your Applications folder
- Find and double-click Velox AI Input
- The app will appear in your menu bar (top-right corner) with the Velox icon
- You'll see a welcome screen with onboarding instructions
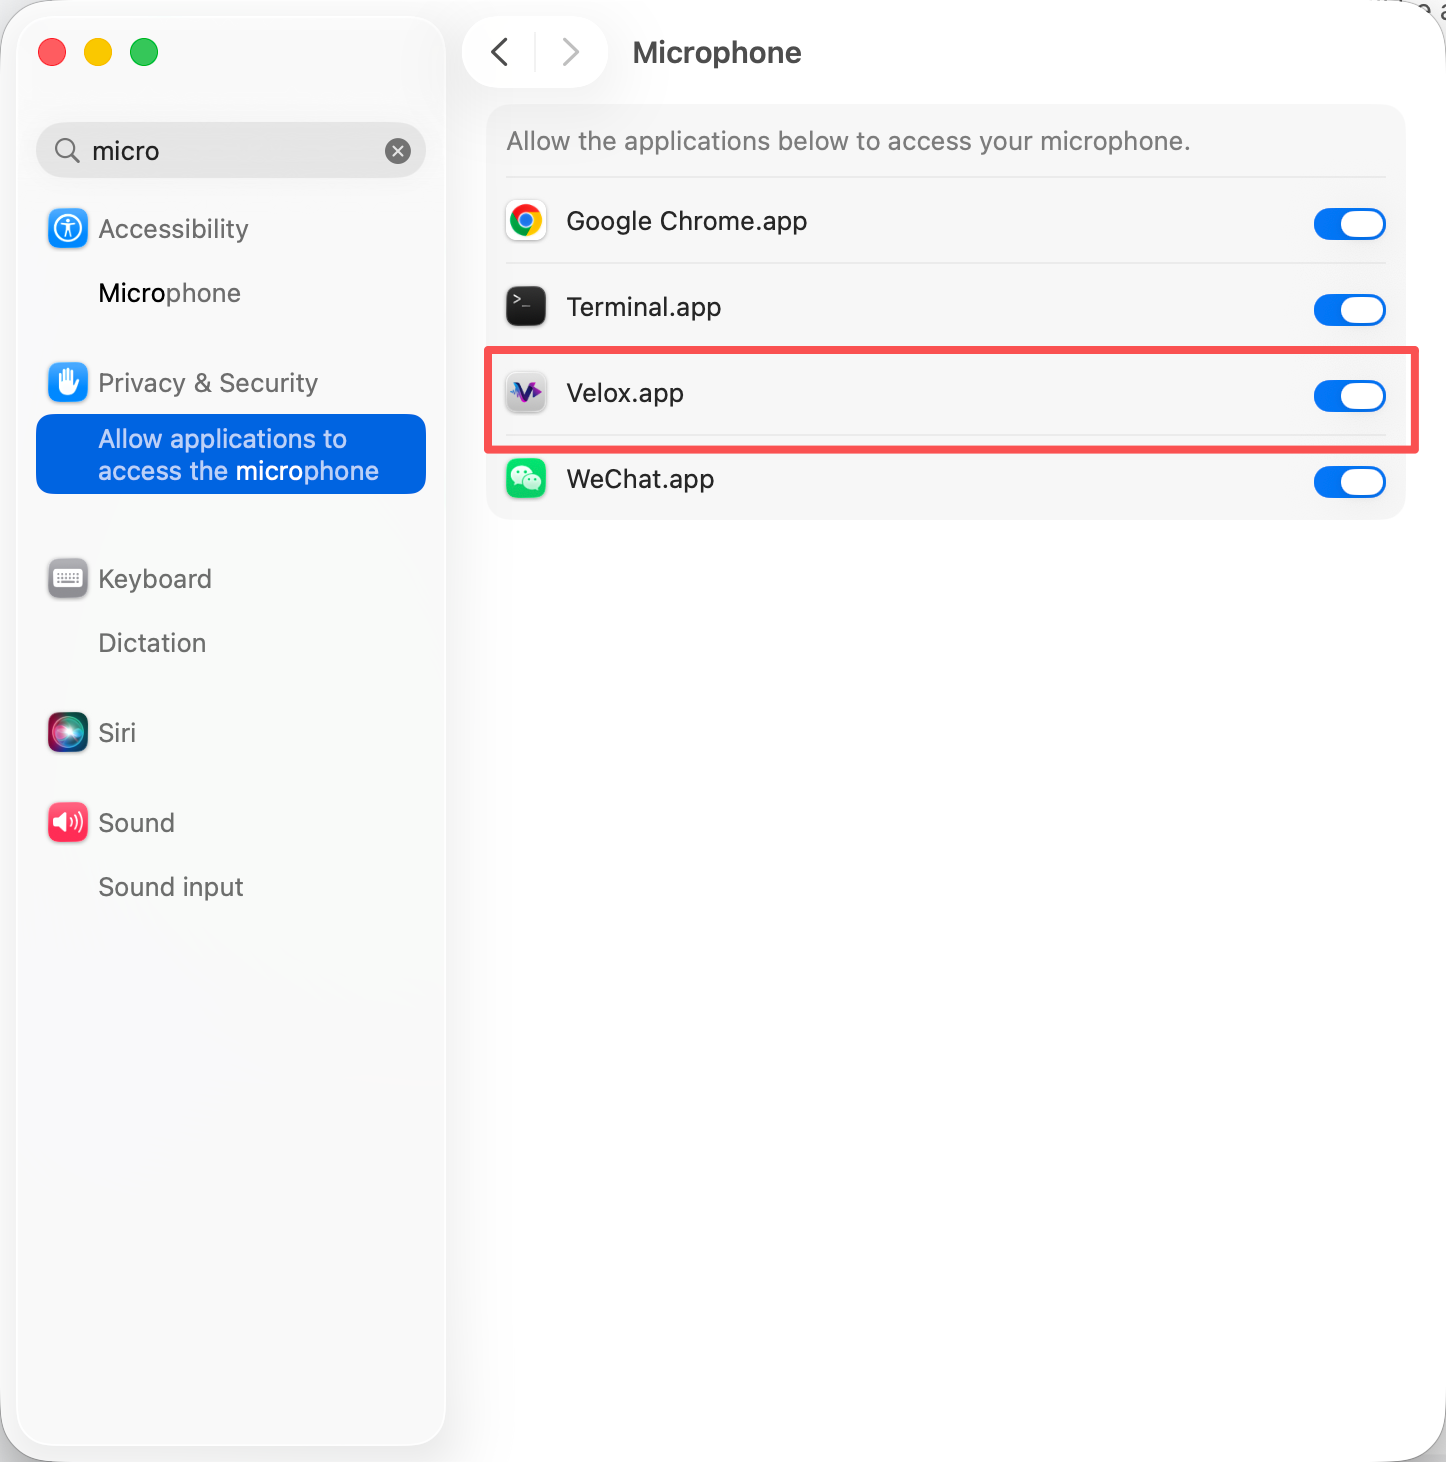
Grant Microphone Permission
Velox needs access to your microphone to record your voice. This is the first permission you'll be asked for.
- When prompted, click "OK" or "Allow" on the microphone permission dialog
- If you accidentally denied it, you can enable it manually:
- Open System Settings (or System Preferences)
- Go to Privacy & Security → Microphone
- Find Velox AI Input and toggle it ON
Review the Keyboard Shortcut
Velox uses the Option key as the push-to-talk shortcut and requires Accessibility permission for automatic paste. Velox uses this permission only to paste your transcription into the currently focused text field after you finish recording.
- Press and hold Option to begin recording
- Release Option to stop recording and process the result
- Return to Velox if another app or shortcut conflicts with Option
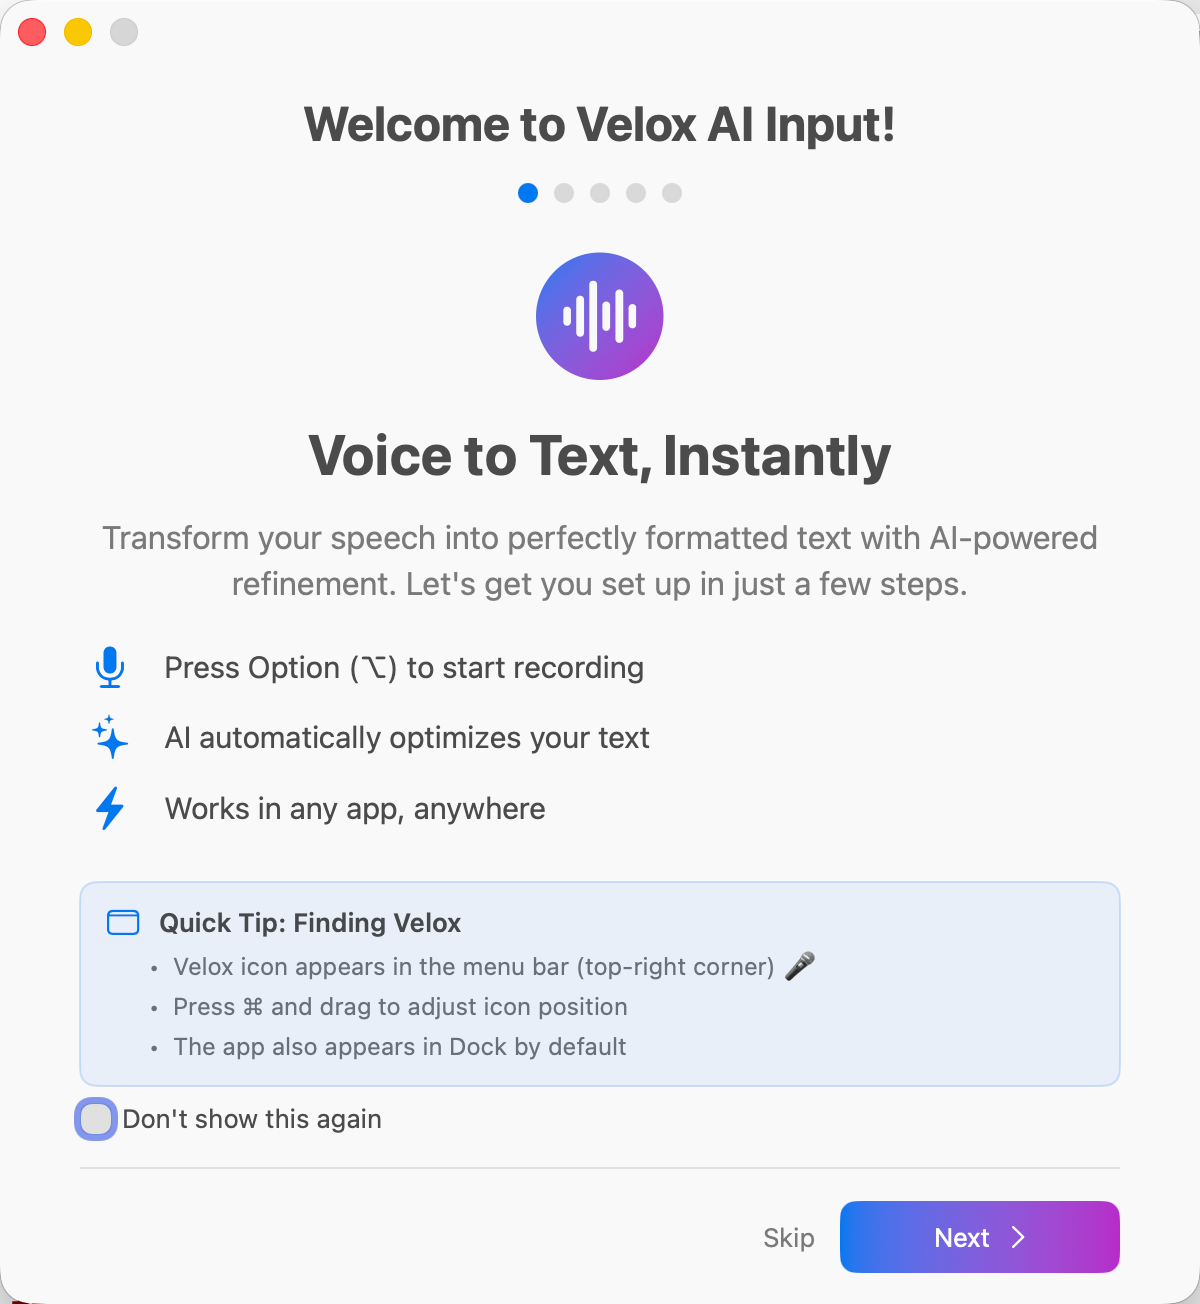
Complete the Onboarding
Velox will guide you through a brief onboarding process to explain the key features.
- Read through the onboarding screens
- Learn about the Option (⌥) hotkey
- Understand the floating panel interface
- Click "Get Started" or "Continue" to finish
Step 3: Configure Your API Provider
Choose Your Speech-to-Text Provider
Velox uses external speech-to-text (STT) services to convert your voice to text. You need to configure at least one provider before you can use the app.
We recommend starting with Groq:
- ✅ Completely free – 14,400 requests per day (no credit card required)
- ✅ 10x faster – Ultra-fast inference with Whisper
- ✅ Easy setup – Takes about 5 minutes
Other options:
- Alibaba Cloud Bailian: Optimized for Chinese and APAC users
- Custom: Use any Whisper-compatible service (DeepSeek, Moonshot, local server, etc.)
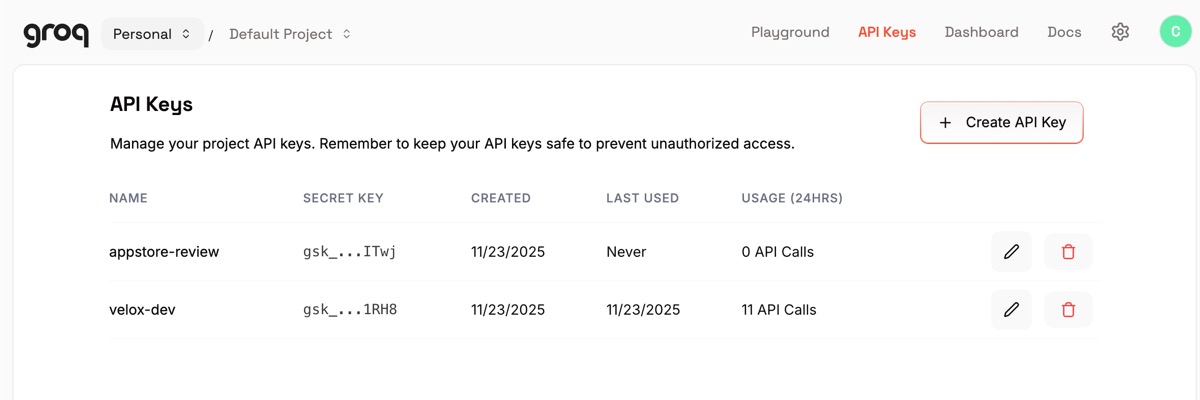
Get Your Groq API Key (Free)
Follow these steps to get a free Groq API key. This takes about 5 minutes.
- Visit console.groq.com/keys
- Sign up with your email, Google, or GitHub account (no credit card required)
- Once logged in, click "Create API Key"
- Give your key a name (e.g., "Velox")
- Copy the API key (starts with gsk_...)
- Save it somewhere safe – you won't be able to see it again!
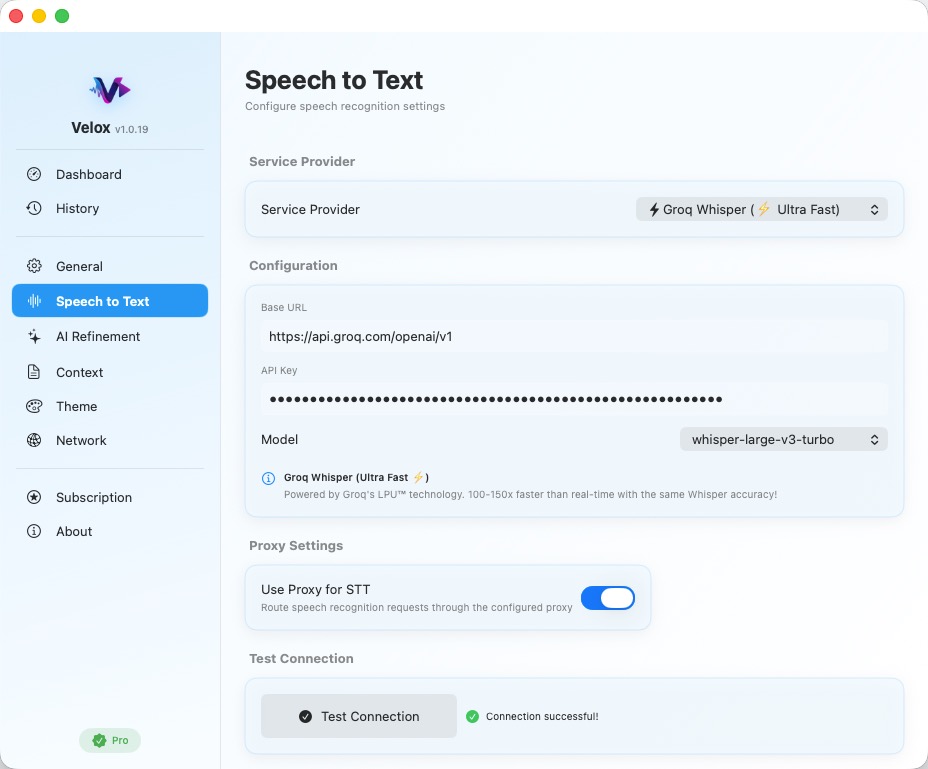
Configure Groq in Velox
Now let's add your Groq API key to Velox so you can start using voice input.
- Click the Velox icon in your menu bar
- Select "Settings" from the dropdown menu
- Go to the "Speech to Text" tab
- In the "Provider" dropdown, select "Groq"
- Paste your API key in the "API Key" field
- The Base URL and Model are pre-configured:
- Base URL: use the Groq default endpoint shown in Velox
- Model: whisper-large-v3
- Click "Test Connection" to verify everything works
- If successful, you'll see a green checkmark ✅
- You copied the entire API key (starts with gsk_)
- You're connected to the internet
- There are no extra spaces before or after the key
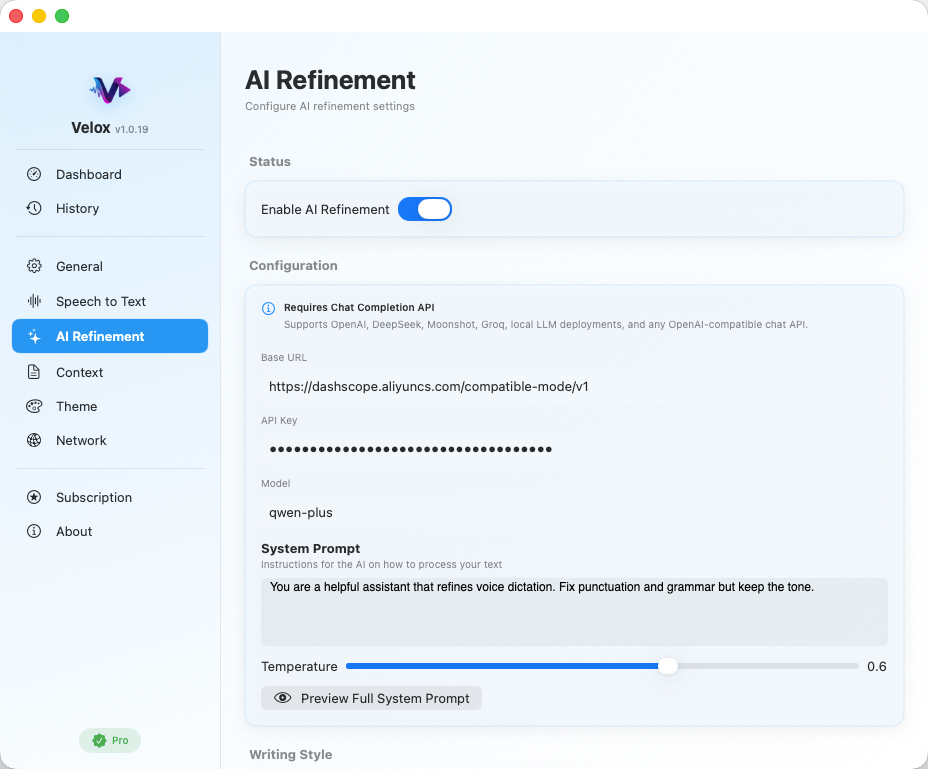
Configure LLM Provider (Optional but Recommended)
Velox can use a Large Language Model (LLM) to improve your transcriptions by fixing grammar, adding punctuation, and making the text more natural. This step is optional but highly recommended.
- In Settings, go to the "Refinement" tab
- Select your preferred LLM provider:
- Groq or another standard-compatible provider: choose a supported chat model from your provider
- Groq: Fast and free (use the same API key as STT)
- Custom: Any standard-compatible chat-completions service
- Enter your API key
- Choose a model:
- Use the model name recommended by your selected provider
- llama-3.1-70b-versatile for Groq (free)
- Click "Test Connection"
Step 4: Your First Voice Input
Prepare Your Test Environment
Before trying your first voice input, let's set up a simple test environment.
- Open a text editor (e.g., Notes, TextEdit, or any app)
- Create a new document or note
- Click inside the text area to make sure it's focused
- Make sure your microphone is working (check the input level in System Settings)
Activate Voice Input
Now let's try your first voice input using the Option (⌥) key.
- Press and hold the Option (⌥) key on your keyboard
- On most Mac keyboards, this is next to the Command (⌘) key
- Some keyboards label it as "Alt"
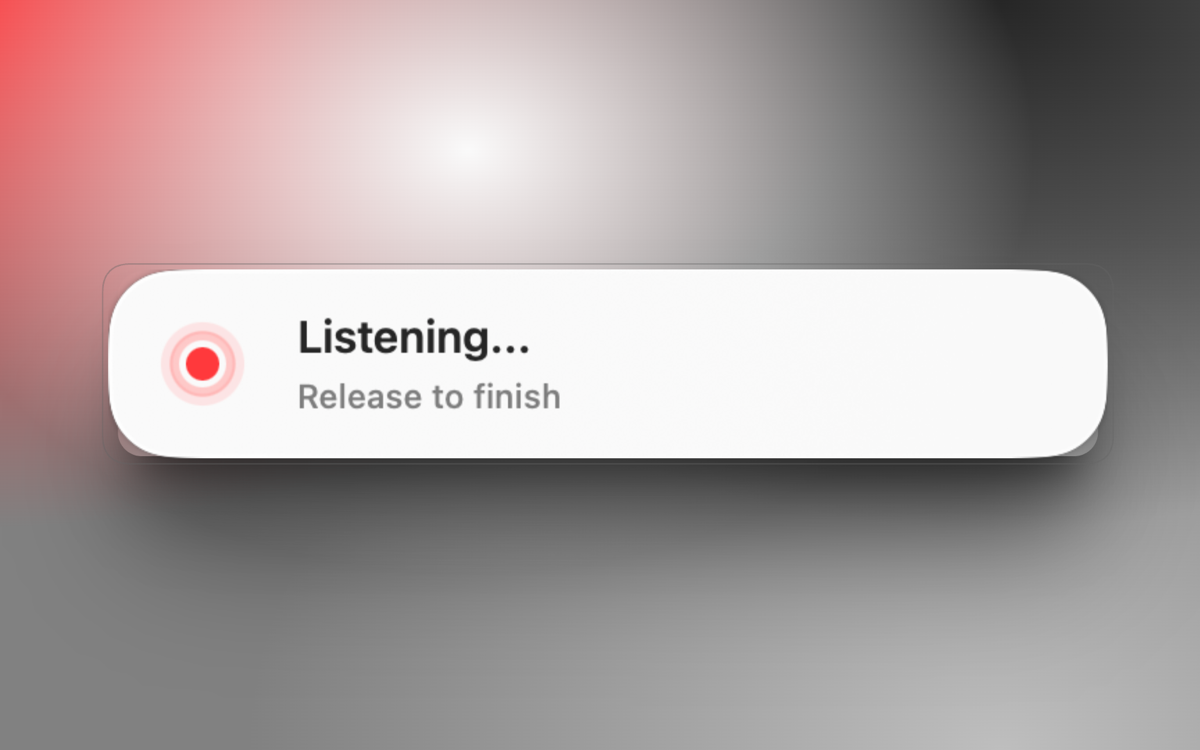
- The Velox floating panel will appear near the bottom of your screen
- You'll see a red pulsing indicator showing that recording has started
- The panel will show "Listening..." with a timer
- Make sure Velox is running (check the menu bar icon)
- Try clicking the Velox menu bar icon and selecting "Show Panel"
- Check whether another app is already using the Option key as a shortcut
Speak Your Message
While holding the Option key, speak your message clearly into the microphone.
Try this sample text for your first test:
"This is my first voice input with Velox. I'm testing the speech to text feature and it's working great!"
Tips for better results:
- Speak at a normal pace (not too fast or too slow)
- Use your natural voice – no need to over-enunciate
- Speak in complete sentences when possible
- Pause briefly between sentences
- Keep background noise to a minimum
Release to Process
When you're done speaking, release the Option key to stop recording and start processing.
- Release the Option (⌥) key
- The panel will change to show "Processing..."
- Velox will:
- Convert your speech to text (using Groq Whisper)
- Clean up the transcription (remove filler words, fix obvious errors)
- Apply light grammar and punctuation corrections (if LLM is configured)
- This typically takes 1-3 seconds depending on your provider and audio length

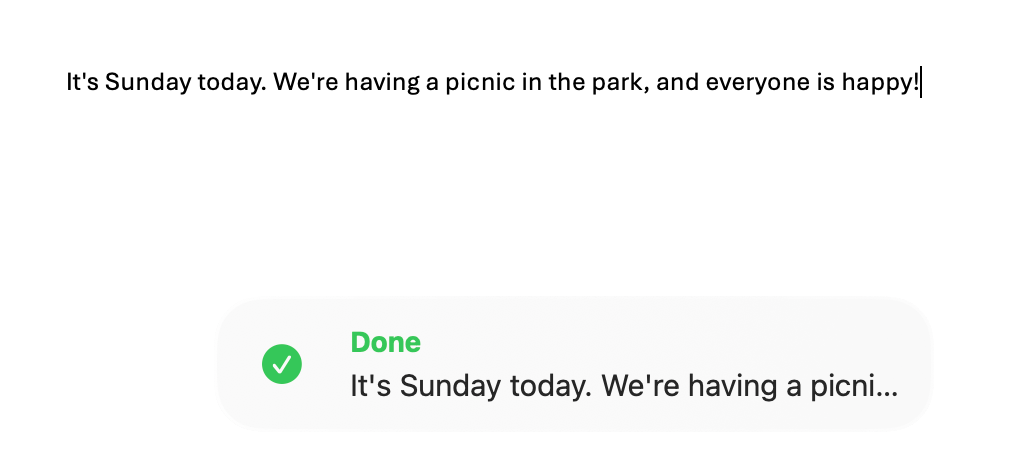
Review & Paste
Once processing is complete, Velox will automatically paste the transcribed text into your active app.
What happens next:
- The transcribed text appears in the panel for a moment
- If the app focus hasn't changed, Velox automatically:
- Saves your current clipboard (so you don't lose what you copied)
- Pastes the transcribed text using ⌘V
- Restores your original clipboard after pasting
- The panel shows a brief success message and fades out
🎉 Congratulations!
You've successfully completed your first voice input with Velox!
You can now use this same process anywhere on your Mac – in emails, documents, chat apps, code editors, and more.
Step 5: Tips & Best Practices
Keyboard Shortcuts
- Option (⌥) – Hold to record, release to process
- ESC – Cancel current recording or processing
Speaking Tips for Better Accuracy
- Speak naturally: Use your normal speaking voice and pace
- Pause between thoughts: Brief pauses help with sentence detection
- Avoid filler words: "Um," "uh," "like" – Velox will try to remove these
- Spell out special characters: Say "comma," "period," "question mark"
- Use context: The LLM works better with complete sentences
Understanding the Writing Styles
Velox offers different writing styles to match your context. You can change this in Settings → Text Processing.
- Casual: Natural, conversational tone (default)
- Professional: More formal language for business communication
- Technical: Preserves technical terms and code-like syntax
- Minimal: Light corrections only, preserves your exact words
Language Settings (Dual-Track System)
Velox uses a powerful dual-track language system that separates interface language from AI output language. This gives you maximum flexibility for multilingual workflows.
Interface Language (UI Language):
- Controls menus, buttons, and settings text
- Supports 7 languages: English, 简体中文, 繁體中文, 日本語, 한국어, Deutsch, Español
- Go to Settings → General → Interface Language
- Requires app restart to take effect
AI Output Language:
- Controls the language of transcription and AI refinement results
- Supports Simplified Chinese and Traditional Chinese as separate options
- Go to Settings → Text Processing → AI Output Language
- Takes effect immediately on next recording
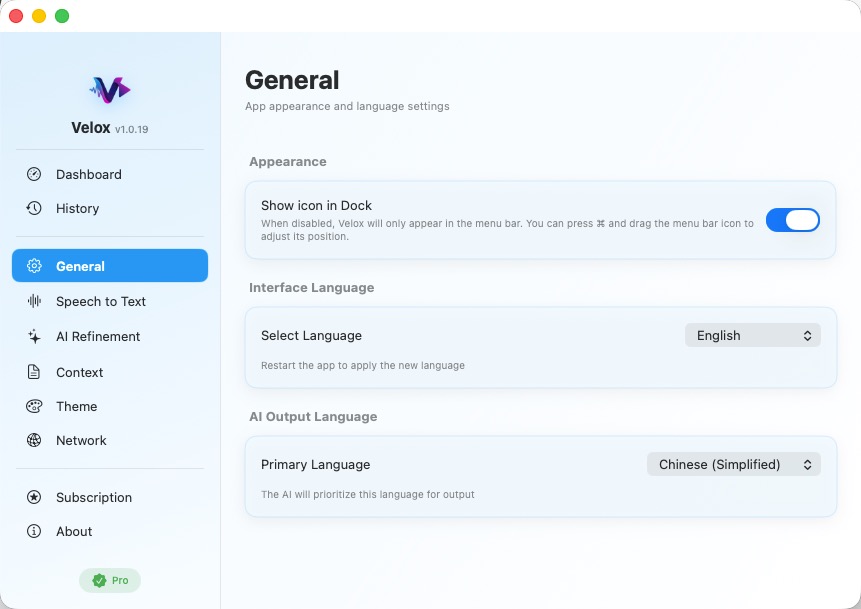
Appearance Mode
Customize how Velox looks with independent appearance mode settings, separate from your system preferences.
- ☀️ Light Mode: Always use light appearance
- ◐ Follow System: Automatically match your macOS setting (default)
- 🌙 Dark Mode: Always use dark appearance
Go to Settings → General → Appearance to change this setting. The change takes effect immediately.
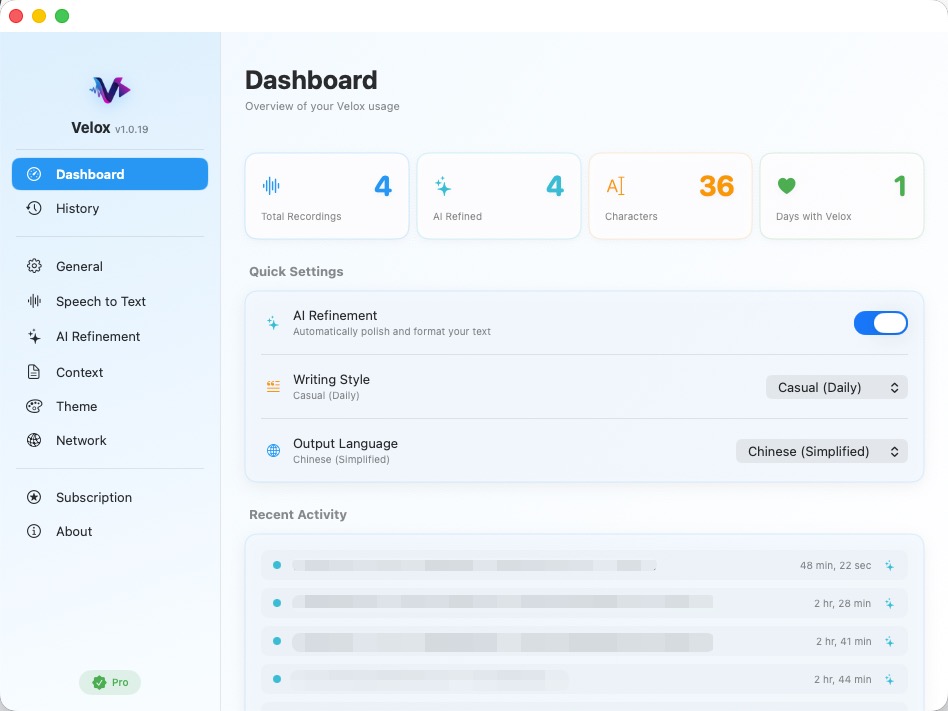
Dashboard & Usage Statistics
Velox provides a Dashboard with useful statistics to track your voice input journey.
Dashboard Statistics:
- Total Recordings: How many transcriptions you've completed
- AI Refined: How many times you used AI refinement
- Characters Transcribed: Total characters transcribed (displayed as 12.5K, 1.2M, etc.)
- Days with Velox: How many days since you first started using Velox
Open the main Velox window (click menu bar icon → Open Velox) to see your Dashboard.
Managing Your History
Velox keeps a local history of your recent transcriptions for easy access.
- Click the Velox menu bar icon
- Select "Open Velox" to open the main window
- Navigate to the "History" tab in the sidebar
- Browse your recent transcriptions
- Click any item to copy it to your clipboard
- Use the search box to find specific transcriptions
Trial & Purchase Information
Velox offers a 15-day free trial so you can fully test all features before purchasing.
- Trial Period: 15 days from first launch
- Full Features: All features are available during the trial
- One-Time Purchase: $4.99 USD for lifetime access
- No Subscription: Pay once, use forever
- Trial Status: Check remaining days in the menu bar or Settings
Troubleshooting Common Issues
🔧 Common Problems & Solutions
The floating panel doesn't appear when I press Option
Solutions:
- Check that Velox is running (look for the icon in the menu bar)
- Check whether another app is already using the Option key as a shortcut
- Try clicking the menu bar icon and selecting "Show Panel"
- Restart Velox from the menu bar (Quit and reopen)
- Check if another app is using the Option key as a hotkey
Microphone permission denied or not working
Solutions:
- Go to System Settings → Privacy & Security → Microphone
- Find Velox AI Input and toggle it ON
- Restart Velox after granting permission
- Test your microphone in another app (e.g., Voice Memos) to confirm it works
- Check that your microphone is selected in System Settings → Sound → Input
Text isn't pasting automatically
Solutions:
- Make sure the target app is focused when you release Option
- Some apps (like Terminal) may require additional permissions
- Try manually copying from the panel if auto-paste fails
- Check that the cursor is in a text field (not just the app window)
API connection test fails
Solutions:
- Double-check your API key (no extra spaces, complete key)
- Verify you're connected to the internet
- For Groq: Make sure the key starts with gsk_
- Try generating a new API key from the provider's console
- Check if your firewall or VPN is blocking the connection
Transcription is inaccurate or has errors
Solutions:
- Speak more clearly and at a moderate pace
- Reduce background noise
- Use a better microphone (external USB mic recommended)
- Try enabling LLM processing for better corrections
- Adjust the writing style in Settings to match your content
- For technical content, use "Technical" writing style
App is slow or laggy
Solutions:
- Check your internet connection speed
- Try a different API provider (Groq is usually fastest)
- Disable LLM processing if you only need basic transcription
- Keep audio recordings under 30 seconds for faster processing
- Close other resource-intensive apps
Trial has expired but I can't purchase
Solutions:
- Make sure you're signed in to the Mac App Store with your Apple ID
- Check your payment method in App Store settings
- Try restarting the Mac App Store app
- Contact Apple Support if purchase fails repeatedly
- Email us at [email protected] if issues persist